What is a Twitch Clip

A Twitch clip is a video segment that both you and your viewers can create over the streams with a length of 5 to 60 seconds.
Are you a streamer on Twitch? If so, surely more than once, you have wanted to keep the best moments of each broadcast.
Next, you’ll learn more about how Twitch Clips can help you.
How can clips help you?
➡️ Generate interaction with your audience
Interact with your viewers by inviting them to participate in the broadcast through your clips.
➡️ Increase your number of viewers
You attract new viewers by sharing your clips on your social networks, showing the funniest moments.

Probably you are eager to start creating your clips, so how can you do it?
How to create a Twitch clip
Creating a Twitch clip is as simple as preparing a cup of coffee. Once you learn how to do it, you won’t stop recording your streaming’s best moments.
- Go to the streamer’s channel and select the video from which you want to record a clip.
- There are two ways to create a clip: Hovering over the video player and clicking on the clip icon, or using the keyboard shortcut.
In the case of Windows, you must press Alt + X and in Mac ⌥ + X.
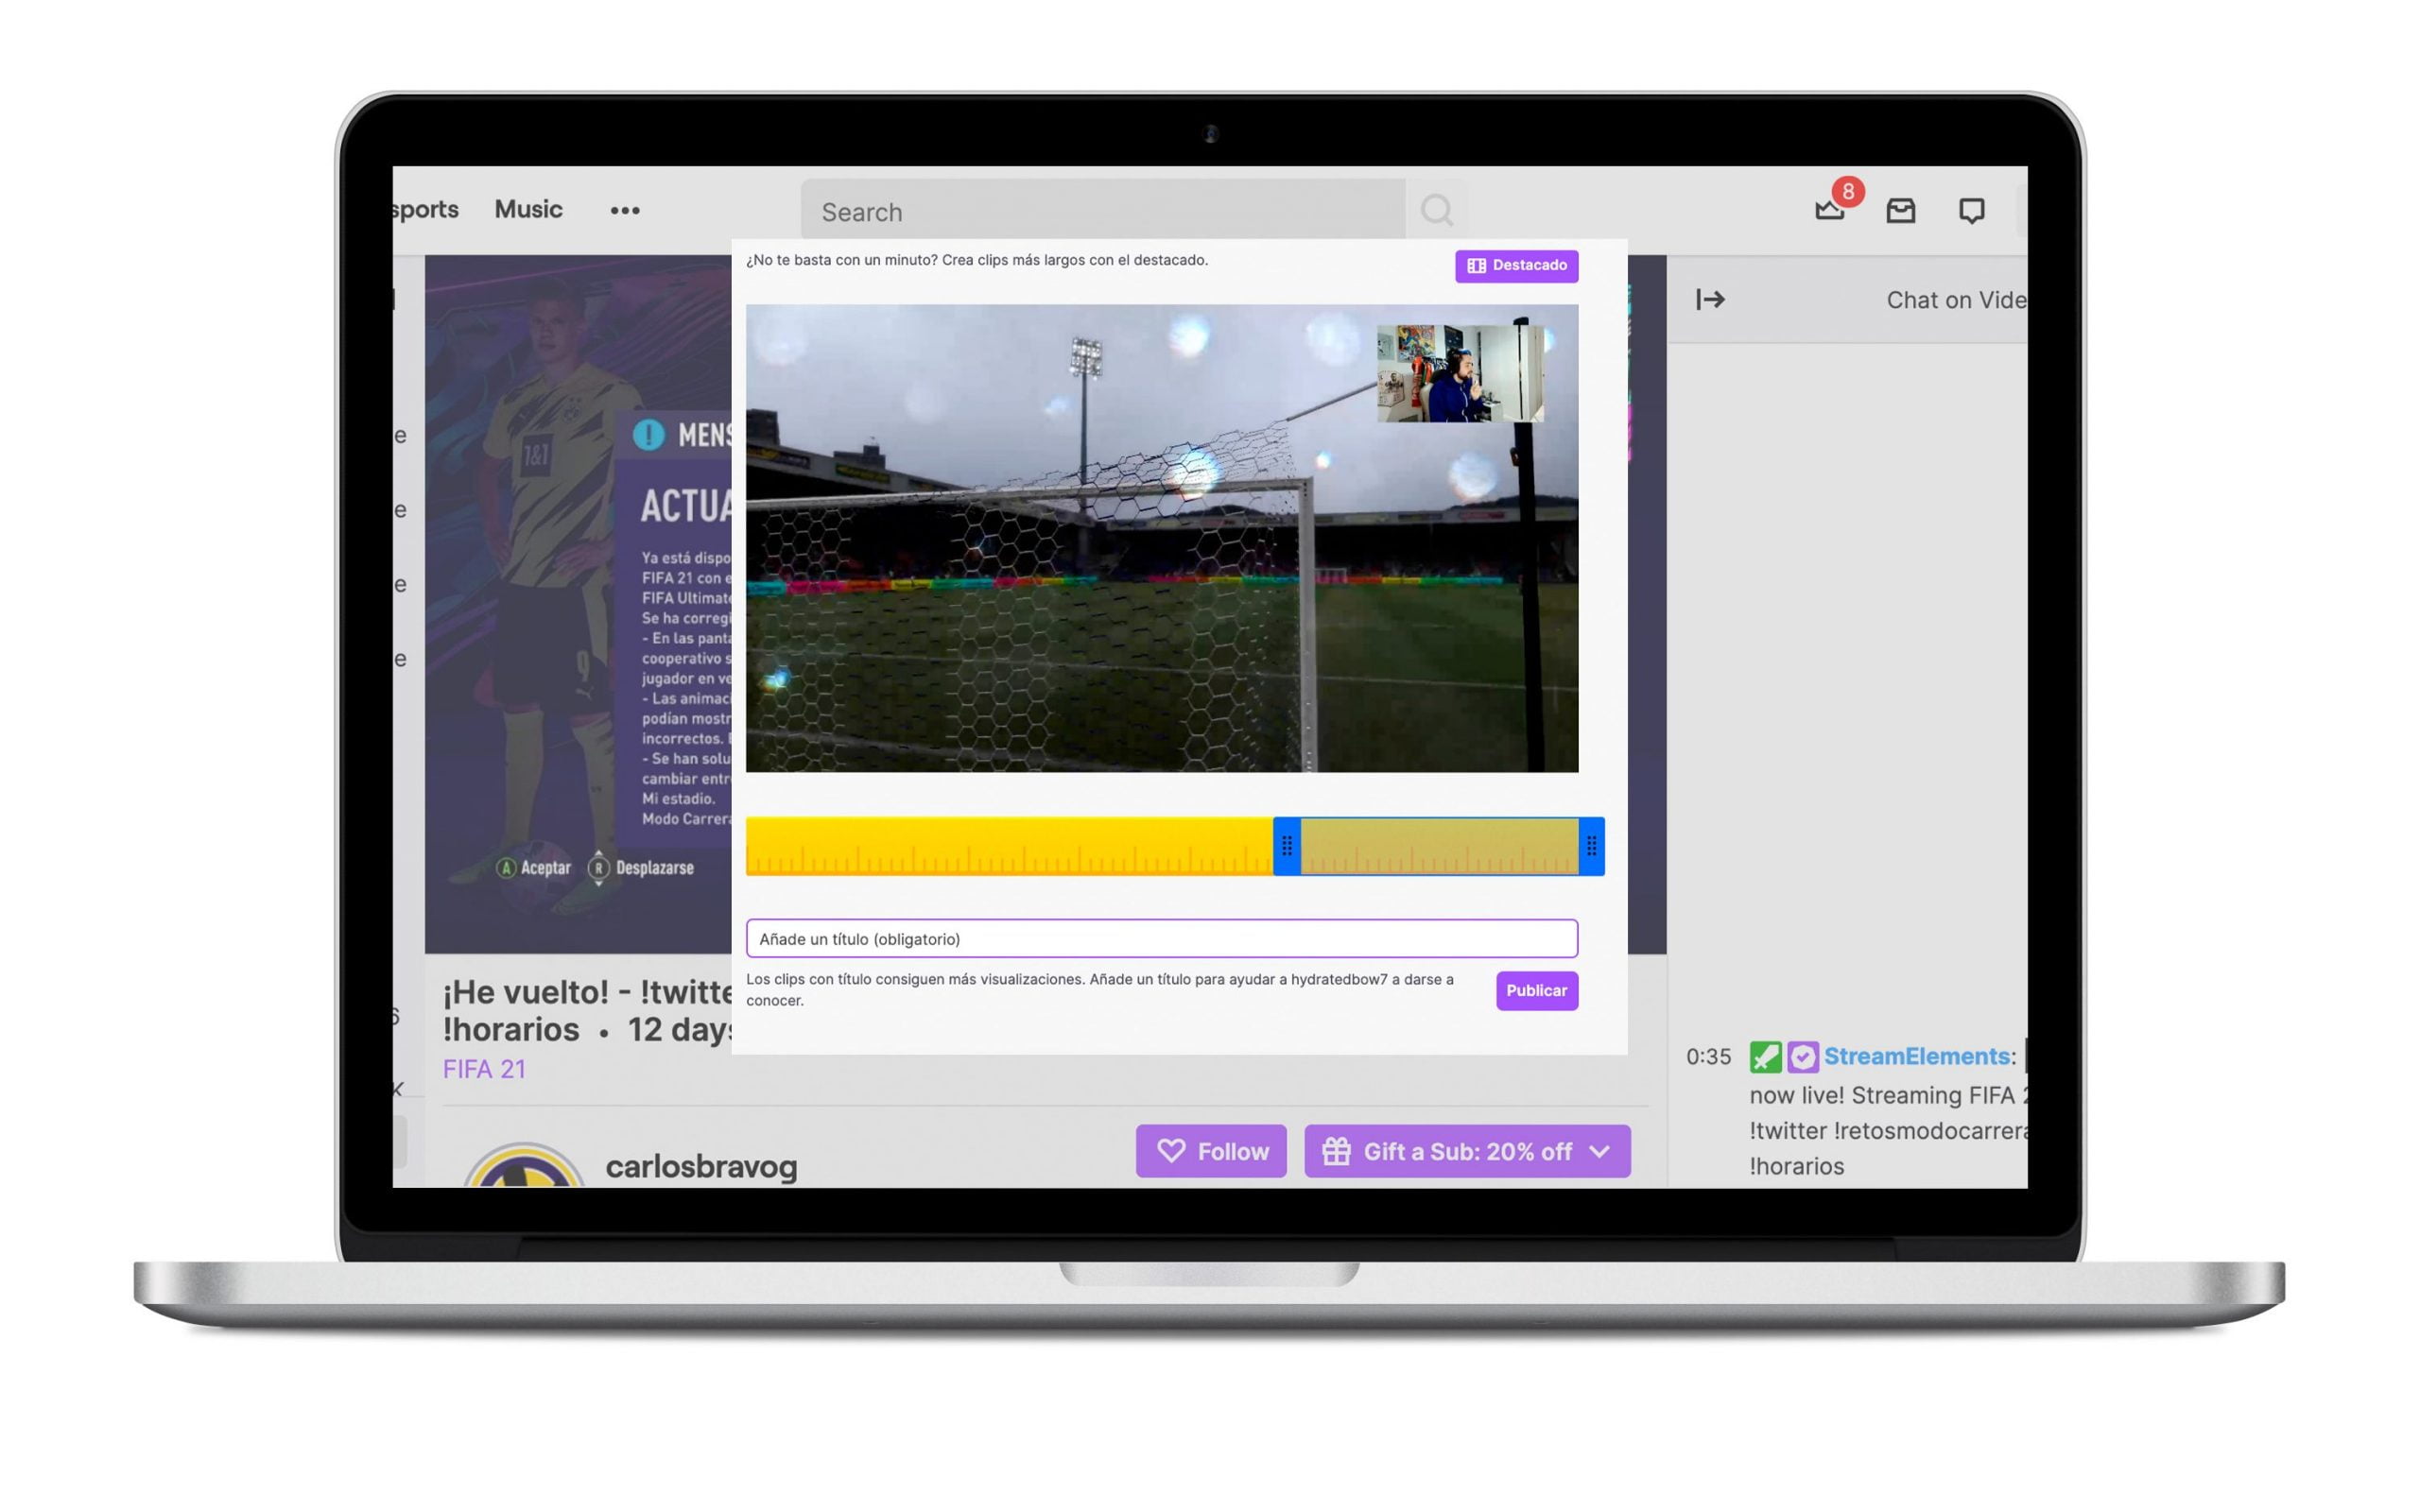
- A new page will open to create your clip.

- Now you can choose the video segment by using the slider below the video and a title that should be striking and related to the clip’s topic. Then, tap Publish.
- Finally, Twitch will provide you with a link to the clip and various options to share (on Facebook, Twitter, Reddit).
- You already have the clip created!
- Now you can see the full clip. You’ll find the title, creator, date, and number of views on the right-hand side.
How to create a clip from your mobile device
Twitch is, without a doubt, an application generally used from the mobile device, and as expected, you can also create a clip from your mobile device, both Android and iOS.
How to create a clip from your mobile?
- Open the channel of the streamer and the video from which you want to create a clip.
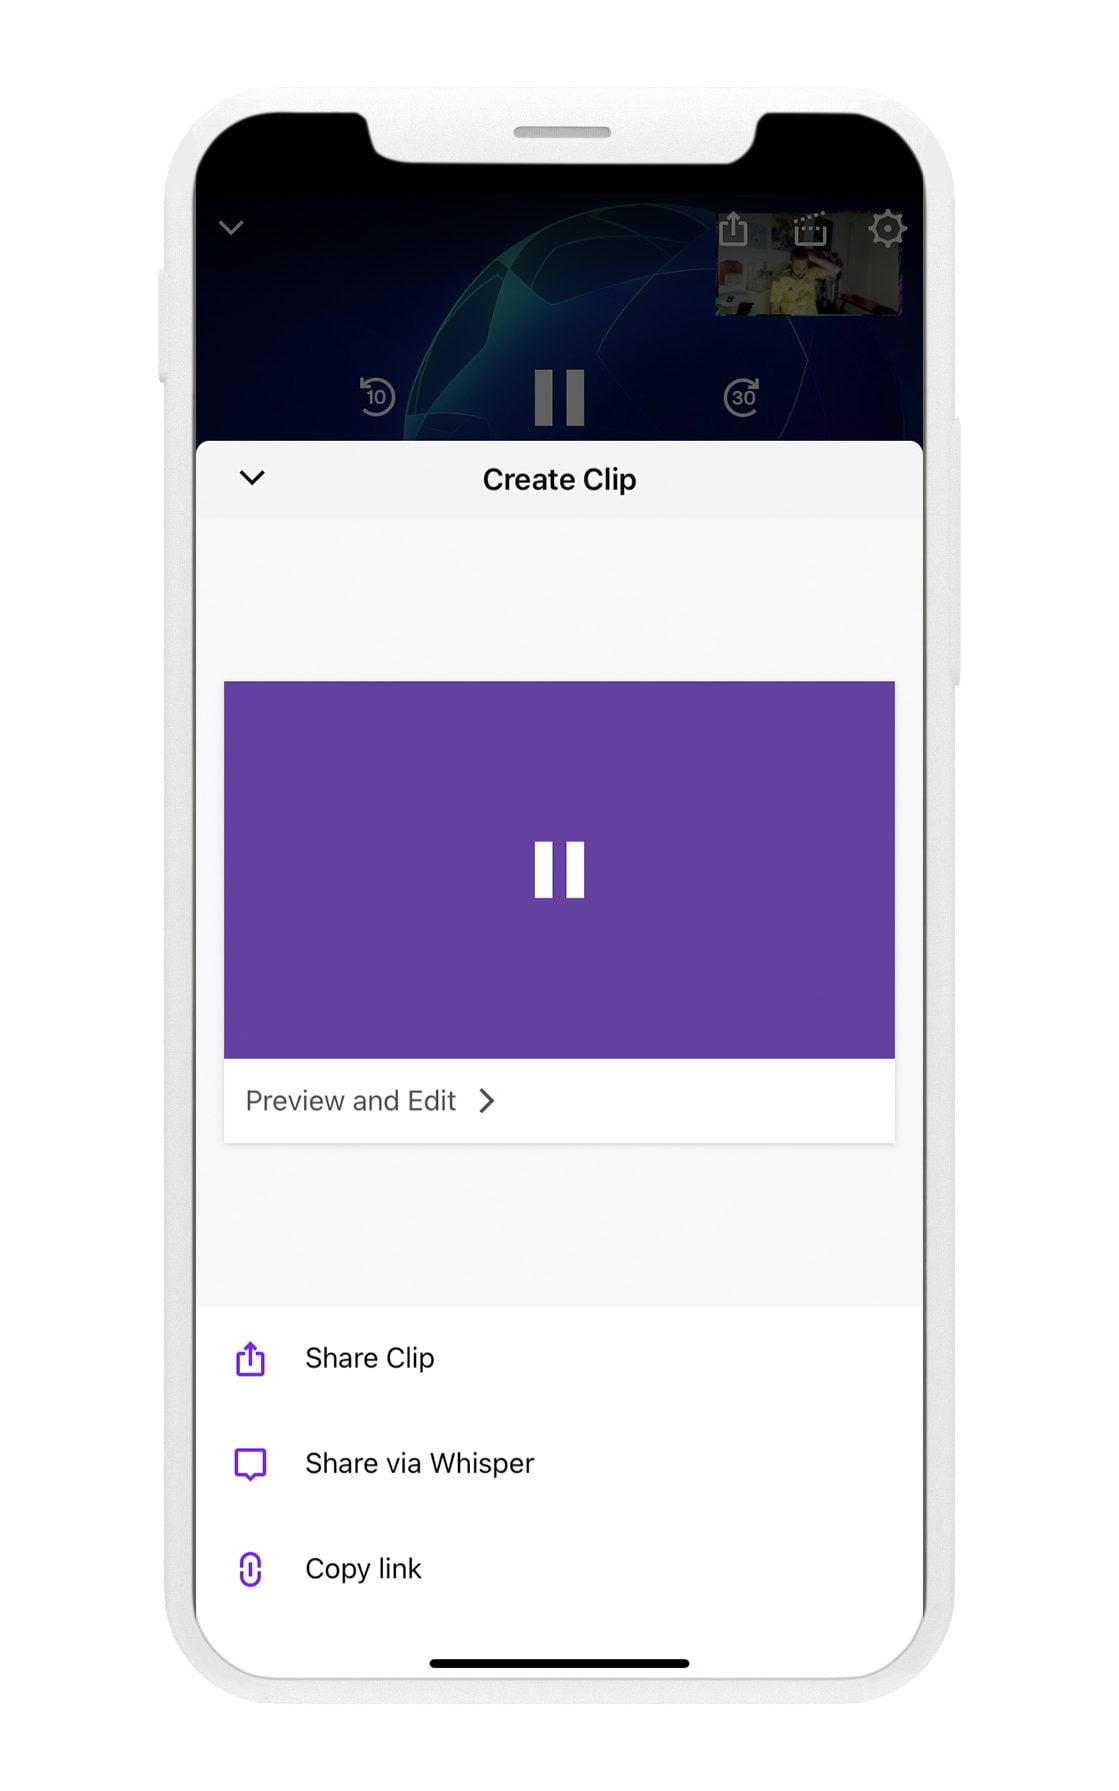
- Tap during the steaming and then click on the ‘Create clip’ button located at the top right. It is similar to a clapperboard, like this one 🎬.

- The app will automatically create the clip, although you can edit and trim it. Also, add the title the same way you can do it on the PC.
- Once you have edited the clip to your liking, you can copy the link or share it on your social channels.
If you have already created several clips, where can you find them?
How to find your channel clips
If you’ve been on Twitch for a while, your viewers may have created multiple clips of your broadcasts, and you might not know yet.
You can find, view and manage your clips from your channel page and the creator dashboard.
- From your channel page.
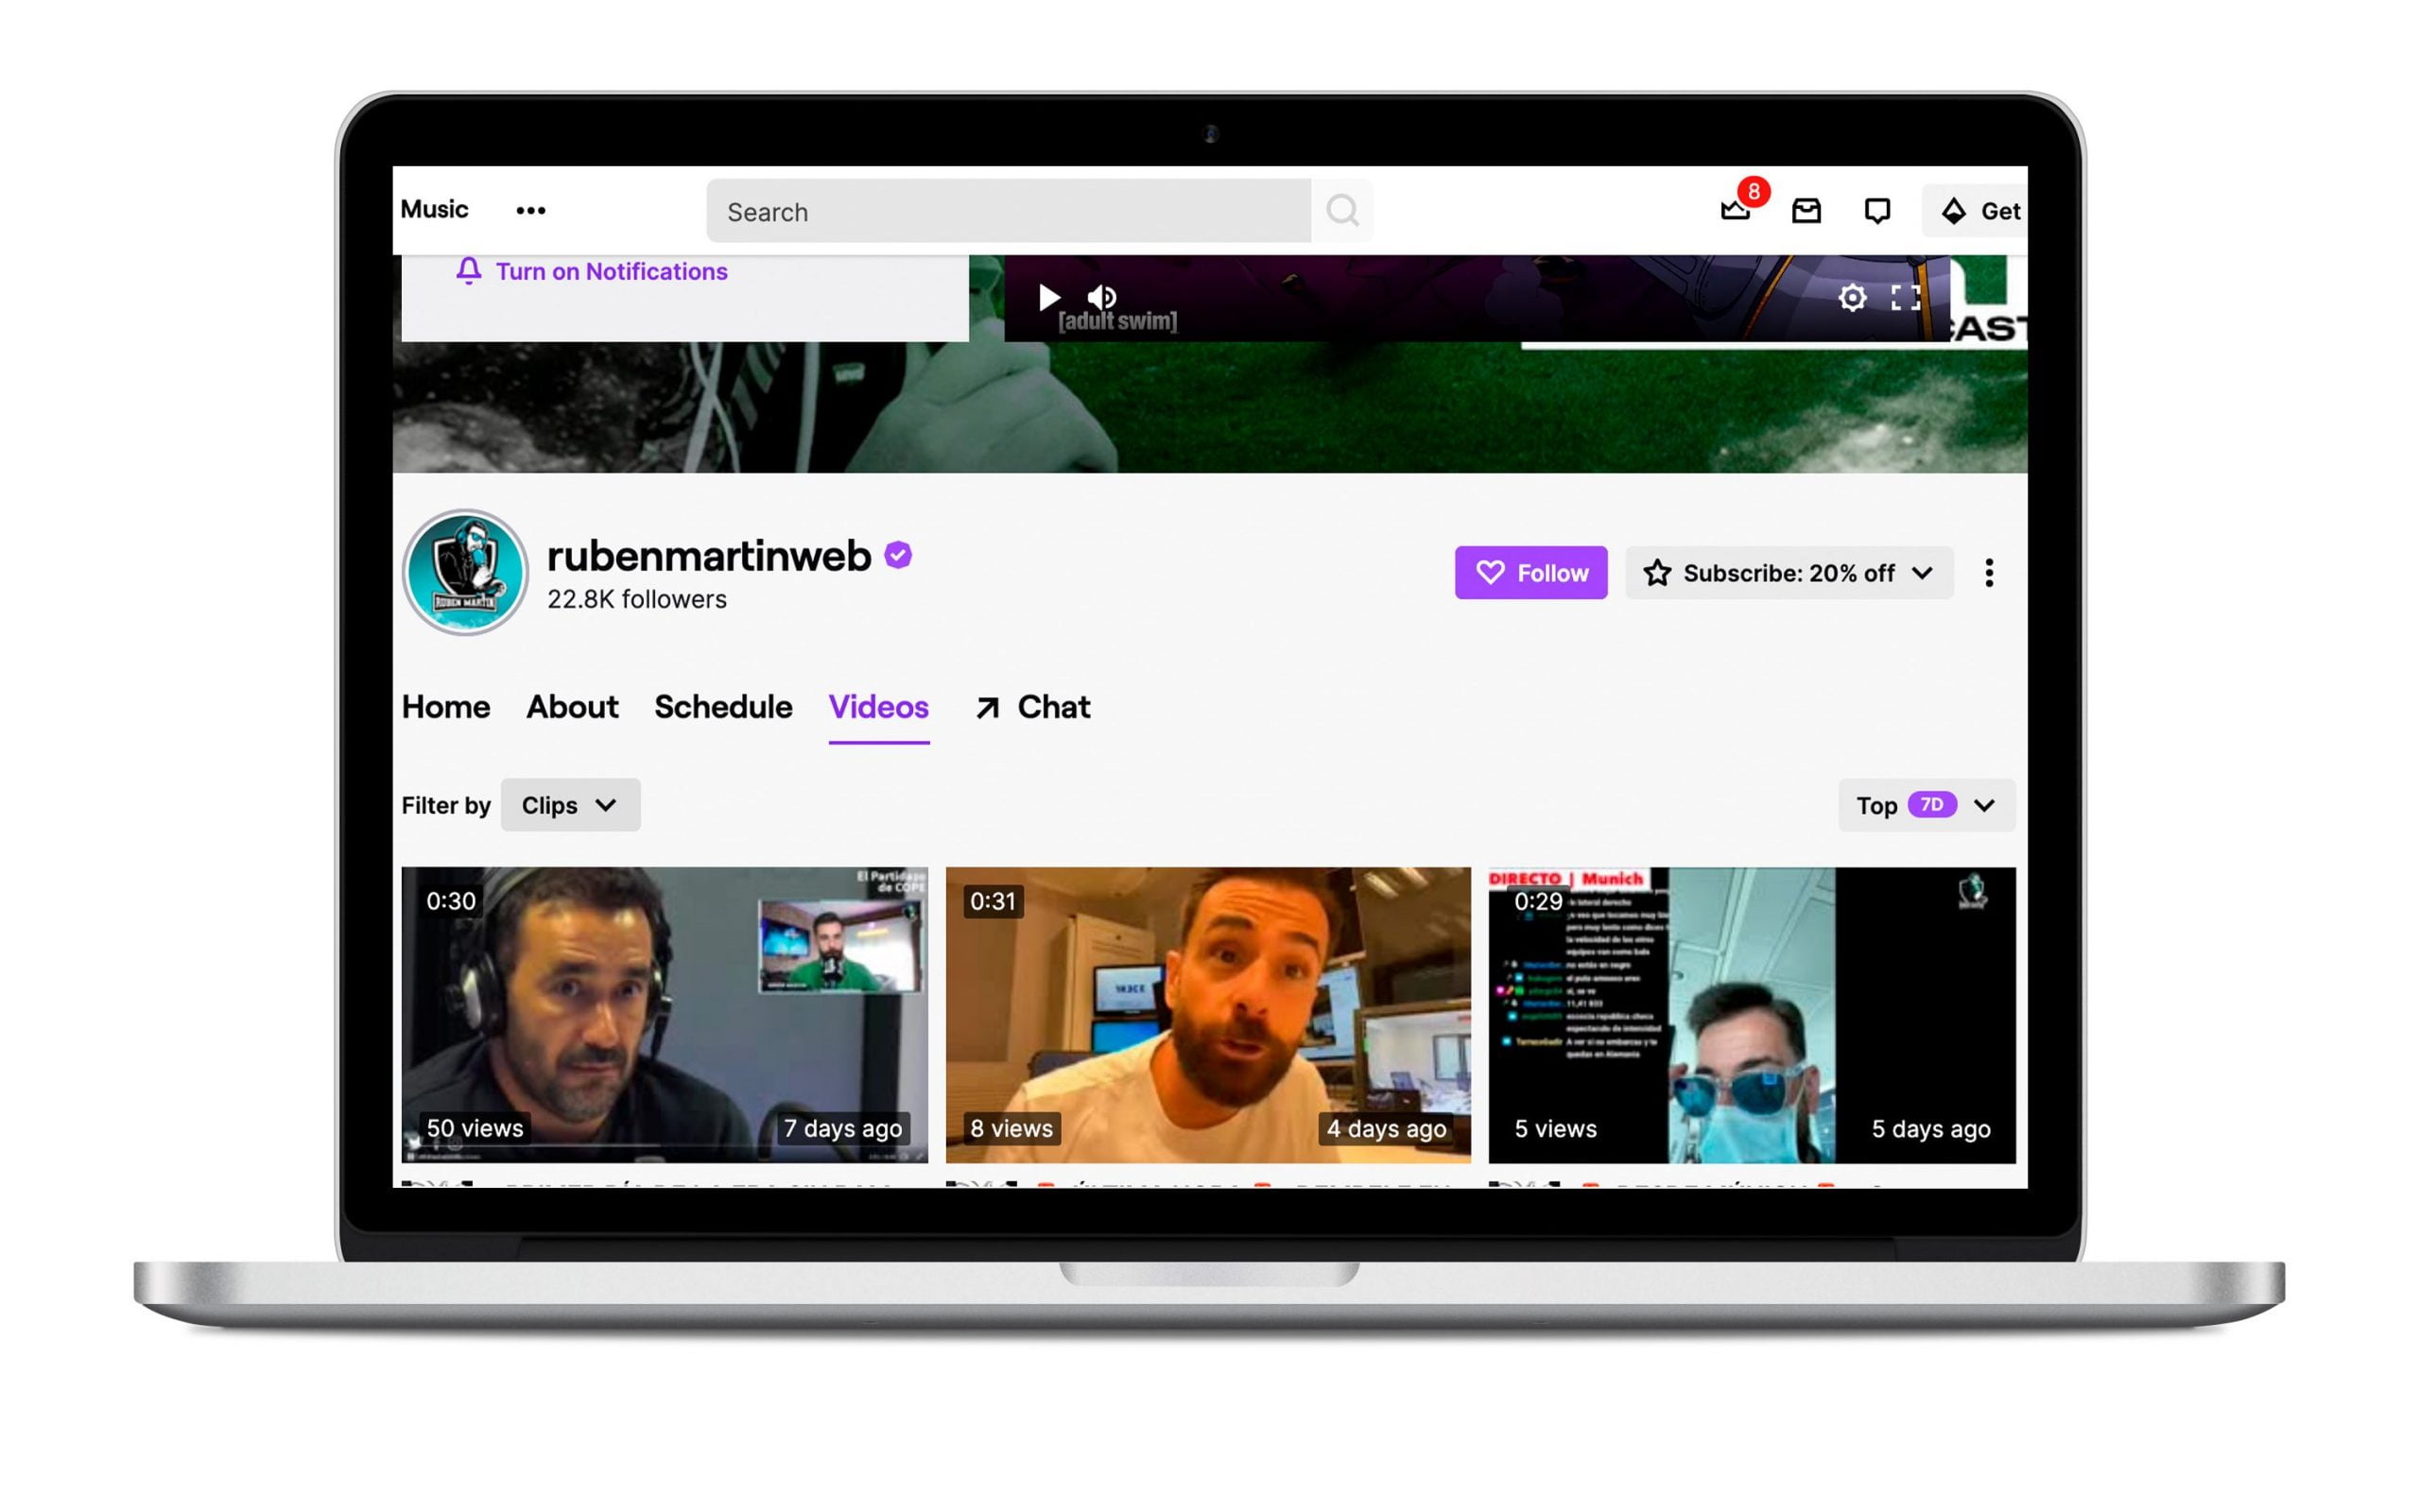
When you visit your channel page, you have the option of viewing the schedule, videos, etc.
If you select ‘Videos,’ you have all the live shows you have recorded so far, and here you can filter by highlights, past broadcasts, or clips.
Once you select a clip, if a user has created it, you have multiple options: watch the full video, report a problem, delete it, delete all the clips, ban a user or temporarily eject it.
As you can see, the platform offers options for you to control everything around your video.
- From the creator dashboard
Another way to manage your clips is from the creator’s control dashboard. You will find this option in the drop-down menu, located in the home page’s upper-right corner.
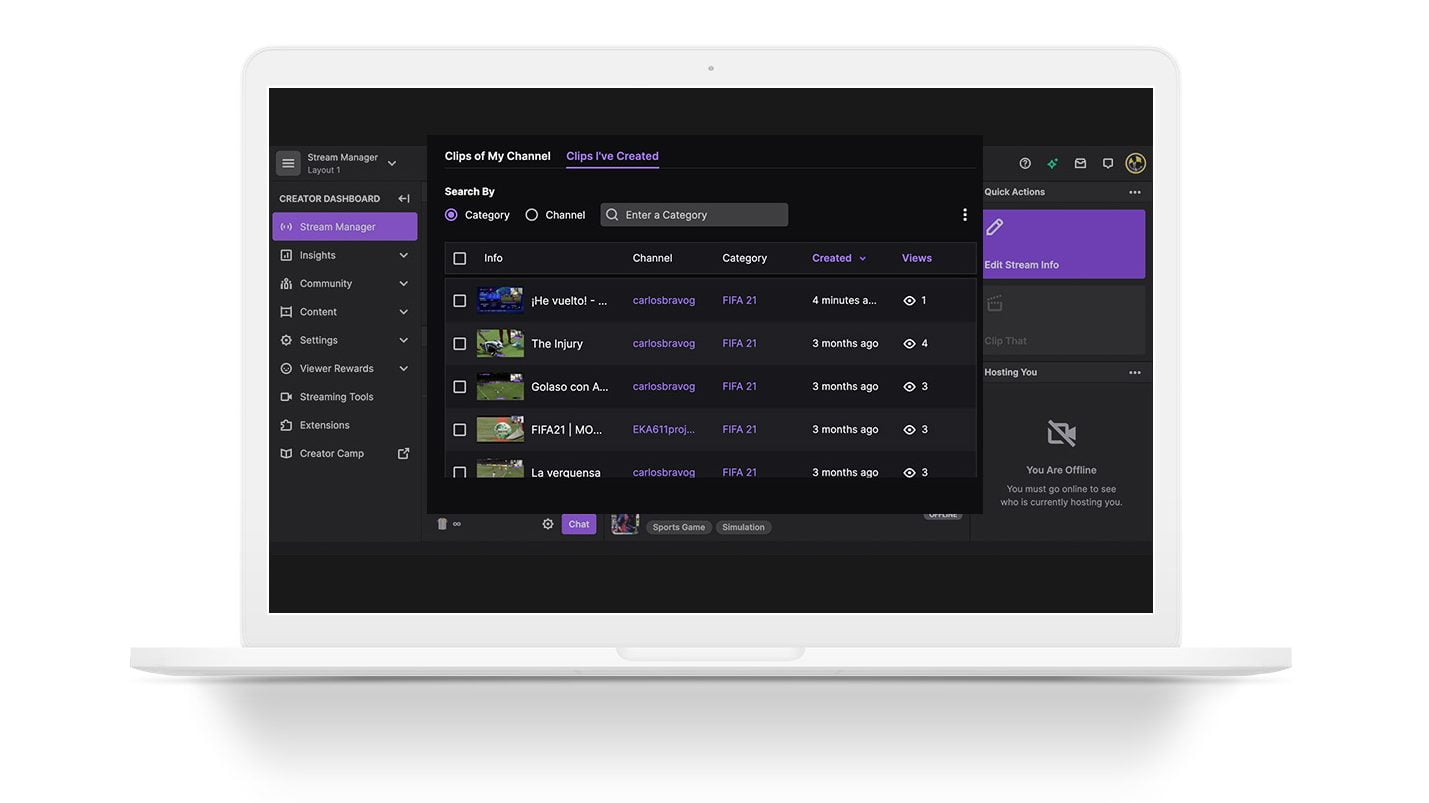
Once you are in the creator dashboard, open the Content tab in the left side column and click on Clips.
In this section, which is simpler and more complete than the previous one, you can filter by clips created by you or viewers, search by categories and sort them according to the creation date and the number of views.

Now that you know where your channel’s clips are, how can you download them to share on your social networks? Simple, keep reading.
How to download a Twitch Clip
To download a clip from Twitch to your computer, you have to go to the creator dashboard, following the same steps as in the previous section.
Here, you will find the clips created by you and your viewers.
How to download each one?
- To download your clips.
You will have to choose the one you want to download and in the drop-down menu, click on the icon at the top right, ‘See on clips page.’
You can see the entire clip and download it with the top left button, indicating the download arrow.
- To download clips created by users.
In the clip library, choose ‘Clips of My Channel,’ where the clips that your followers have created will be stored.
This step is more straightforward because you have the download button located to the right of the clip. You touch the download button, and the platform will download it to your computer automatically.
What if you want to delete a clip? Don’t worry. It’s easier than you think.
How to delete a clip from Twitch
You might want to delete a clip created by followers if you consider that the clip is out of context, its quality is not good enough, or for any other reason.
Deleting a clip from Twitch is relatively straightforward, and you can do it both from your channel page and the creator dashboard.
- From your channel page.
On the same page where all the videos are displayed, select the clip you want to delete.
When you enter the clip, click on the three vertical dots on the right, touch ‘Delete.’ Then, you will have to confirm this action by clicking on ‘Delete’ again.
- From the creator dashboard
From the creator dashboard, you can also delete these clips one by one or select multiple clips to delete simultaneously.
You just have to click on the check box to the left of the clip you want to delete and tap on ‘Delete selected.’ Also, you can delete all your clips by tapping on ‘Delete all clips I’ve created’ or ‘Delete all clips from my channel.’
This is all you can do with Twitch clips. Take advantage of all the possibilities to continue growing as a streamer and increase your community of viewers.
And if you want more tips about Twitch.
If you have any questions, we’ll read your comments.

