YouTube Tutorial for Beginners

If you’re new to this social network and want to know how to create a YouTube channel from scratch, you’re in the right place. Welcome to this YouTube tutorial for beginners!
YouTube first launched on February 14th, 2005, and has since grown to become the second most visited website, after Google Search.
With over 2.5 billion monthly active users, there are many opportunities to boost your brand’s visibility and create content that provides resources, solutions, and entertainment to your audience.
In this YouTube tutorial for beginners, we will run through each step to create a YouTube channel from scratch, as well as provide tips and tricks for managing and growing your channel.
How to Create a YouTube Channel
Anyone can watch YouTube videos with a Google Account, but without a YouTube channel, you cannot upload videos, comment, or make playlists.
You can either create a YouTube channel through the website version, or by downloading the mobile app, on iOS or Android.
Then from here, you need to decide if you want to create a personal channel or a business channel.
For personal channels, only the owner will be able to manage this account using their Google Account. Business accounts can have multiple managers and owners.
Creating a personal channel
If you decide to go the solo route, follow these steps to set up your channel:
- Sign in to YouTube on the web or mobile version.
- Click on your profile picture, and then on Create a channel.
- You will need to enter your personal information, and then check all the information is correct.
- Confirm and your channel will be created!
Creating a business channel
When creating a channel that reflects your brand, you can connect your channel to a Brand Account. This allows for other users to manage the channel. Follow these steps to create your business channel:
- Sign in to YouTube on the web or mobile version.
- Head to your channel list, inside Settings, and under Account.
- If you want to create a new channel, select Create a new channel.
- You can also create a channel for a Brand Account, by choosing the Brand Account from the list. If this Brand Account already has a channel, you cannot create a new one.
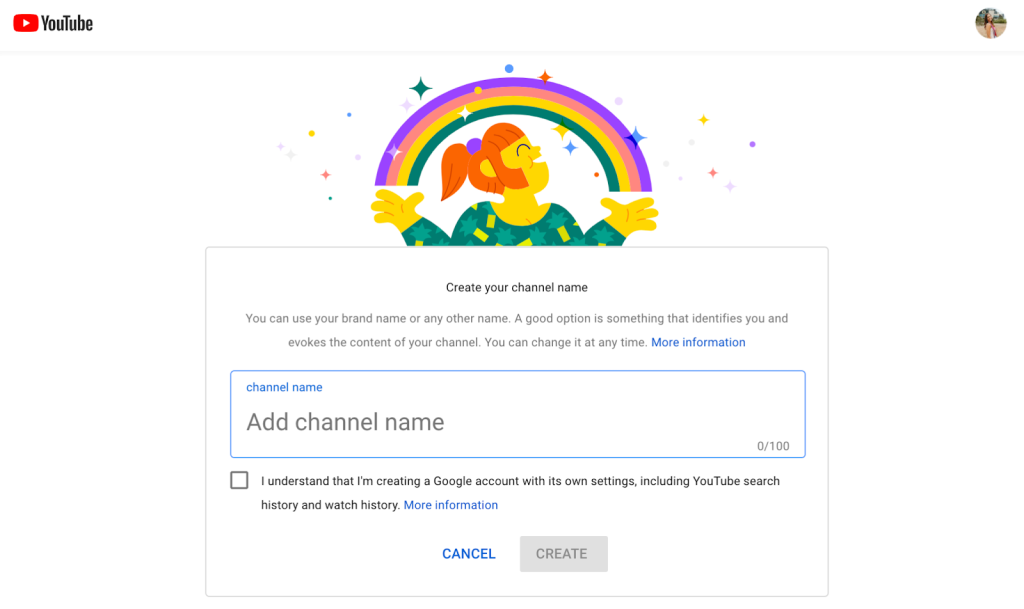
- Create a channel name, and enter the details of your new channel. Click Create, and a new channel will be created.

How to add channel managers and owners
For Brand Accounts, you can add other users to manage the channel. To do this, head to your channel settings, and then to the Account tab.
You will see an option that says, Channel Administrators, which you can then manage all permissions.
Here you will see a list of all those users that manage or own the channel. In this section, you will also be able to add users, change permissions, and delete managers or owners.
If you are the account owner, you can invite users by clicking on Invite new users. You will need to enter their email address to send the invitation. After they accept the invitation, they will have immediate access to the channel.
To clear things up, let’s run through each of the roles in a YouTube channel:
- Owners can control who manages the account, and they have the highest authority. There also must be one primary owner.
- Managers can access the Google Services linked to the Brand Account however, they cannot add, manage roles, or delete users.
- Communication managers have the same accessibility as managers however, they cannot use YouTube.
Customize your Channel
After setting up the basics of your channel, the next part of this YouTube for beginners tutorial is where you will establish your brand voice and imagery. You can add an icon banner, a trailer, a description, and up to 14 links.
By taking advantage of these options, your account will be set up for success to attract users and direct them to your website, or other social media accounts.
Plus, when you sprinkle in keywords and hashtags, this can help boost your SEO. Want to learn more about SEO on YouTube? Read this article below.
YouTube Channel Sections
Inside your channel, there are a few different sections. These include:
- Home: The homepage of your channel will show your channel trailer or any highlighted video. Below you will see popular videos from your channel, a list of your latest videos, as well as Shorts.
- Videos: This section will show all of the long-form videos you have uploaded to the platform.
- Shorts: Here you will find all of the Shorts you have uploaded.
- Live: This is where any live videos you have done will live.
- Playlists: Any playlists you have created will appear here, organized by playlist name.
- Community: YouTube Community is where you can post channel updates, polls, and questions, to stay connected with your audience.
- Channels: For Brand Accounts, this is where you will see all other channels connected to this channel.
- About: This section will show your channel description, stats, details, and links.
Navigating YouTube for Beginners
On the left-hand side, you will see a few different icons. These are all the different sections of YouTube.
Homepage
Now that your channel is established, and optimized, it’s time to explore the app and see what options are available! When you first enter YouTube, you will see the homepage, which functions like a “For You” page on other networks.
You have the option to like, dislike, comment, and share YouTube videos. When clicking on the three-dot icon in the bottom right corner you have other options available.
For YouTube videos, you can also:
- Download: Only available for YouTube Premium members, this allows you to download videos to your computer or device.
- Clip: You can also clip parts of videos, which you can then share across other platforms and apps.
- Keep: This option allows you to save videos in your playlists.
- Report: If you find a video that has inappropriate content, you can report it by clicking on the flag icon.
- Show Transcript: If you want to add a word-for-word transcript, you can do so by clicking on this option.
Shorts
Underneath the homepage, you will see the Shorts option. YouTube Shorts are short-form video content. This works similarly to Reels or TikToks, where you can scroll through to watch and interact with videos.
You have the option to like, dislike, comment, and share YouTube Shorts. When clicking on the three-dot icon in the bottom right corner, you have other options available.
For YouTube Shorts, you can also:
- Description: You can see the full Shorts description by clicking on this option.
- Save to playlist: Add Shorts to your channel playlists with this option.
- Subtitles: Add subtitles to the video by clicking on the Captions button.
- Don’t recommend this channel: If you don’t want to see content for a specific channel anymore, select this option.
- Report: If you find a video that has inappropriate content, you can report it by clicking on the flag icon.
- Send feedback: Describe your feedback and send it to YouTube.
Subscriptions
Inside this section, you will find all the latest videos from those channels you are subscribed to. Think of this as the “Following” section on other social networks.
To subscribe to a channel, simply head to a specific channel or video, and you will see a Subscribe button.
Library
This last section is where you will see all your history including watched videos and Shorts, liked videos and Shorts, videos to watch later, and your playlists.
Plus on the right side of the screen, you will see how many channels you are subscribed to, how many video uploads you have, and the number of likes you have left on other videos.
Create
Although these next three sections aren’t part of the main “feeds” on YouTube, they are still important to mention. In the top-right corner, you will see a video camera icon with a plus sign in the middle.
Here you have the option to upload a video, go live, or create a post. If you want to upload a video or go live, this will take you to YouTube Creator Studio, where you can upload your video. To go live, you have the option to go live right now or schedule a later date.
Creating a post will take you to the Community tab, where you can add text, video, or a poll to be posted to this section.
Notifications
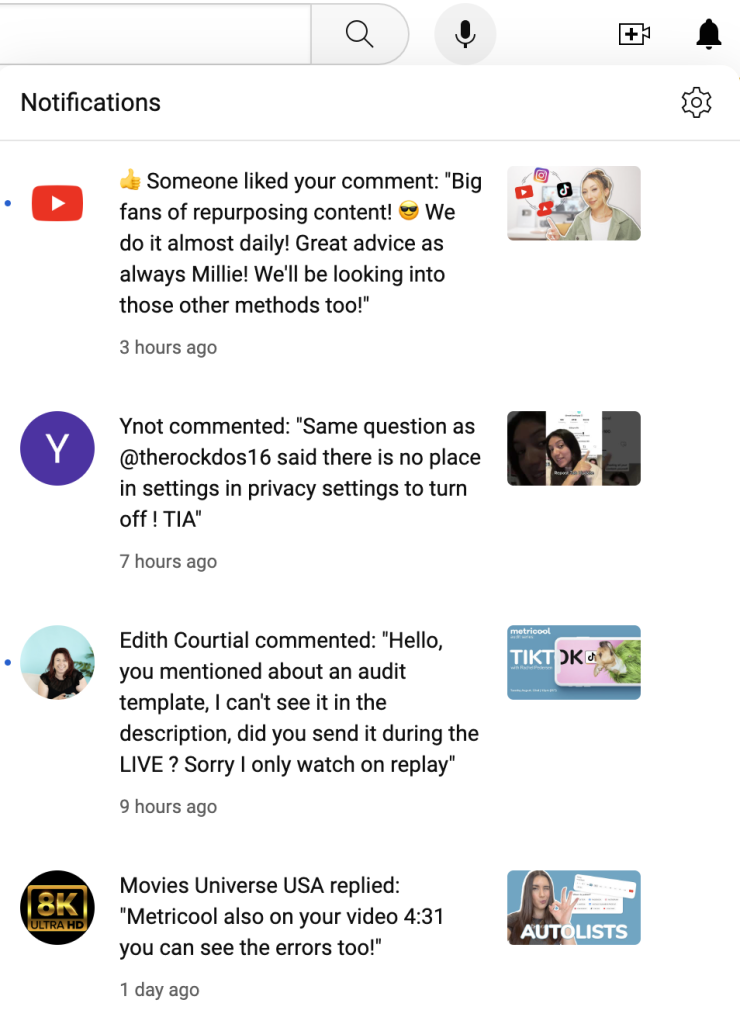
Next to the Create icon, you will see a bell icon, which is the Notifications section. Here you will see all the recent notifications from your channel including comments, replies, likes, as well as updates from those channels you are subscribed to.

Account
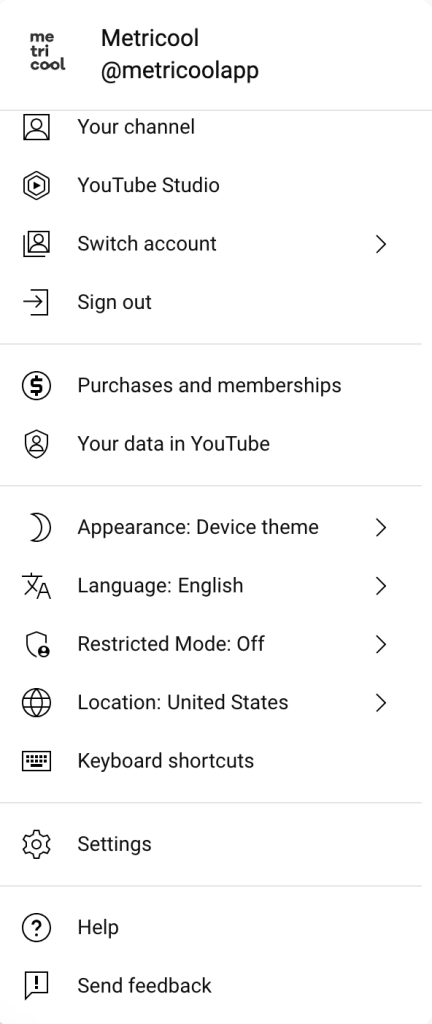
Next to Notifications, you will see your channel profile picture. This is where you will click to head to your account settings, YouTube Studio, purchases and memberships, data, appearance, language, location, keyboard shortcuts, settings, help, and send feedback.
This is also where you can switch accounts, or log out.

How to Upload a YouTube Video
Alright, now that you are familiar with the network, and have completed your channel. It’s time to upload your first video! Follow this guide below to upload your video:
You can also upload and schedule videos to YouTube and Shorts, from Metricool. With this, you can schedule videos ahead of time, and then view your video performance using our in-depth analytics. Then, create social media reports, so you can continue to improve your strategies.
This concludes the YouTube tutorial for beginners, so you can start creating content and managing your channel with ease. Happy YouTubing!

